1
2
3
4
5
6
7
8
9
10
11
12
13
14
15
16
17
| ### Install package: ntfs-3g
sudo apt-get update
sudo apt-get install ntfs-3g
### Create mount point
sudo mkdir /media/windows
### Check disk whether it is formatted NTFS file system
sudo fdisk -l
### 기본적으로, 해당 Package를 설치 시, 자동을 /media 하위에서 mount된 disk를 확인 가능하다
### Link to mount point
sudo ntfs-3g /dev/sda1{or other path} /media/windows
### Unmount
sudo umount /media/windows
|
Disk mount 하기
1
2
3
4
5
6
7
8
9
10
11
12
13
14
15
16
17
18
19
20
21
22
23
| ### Check volume
sudo fdisk -l
### Create file system
sudo mkfs.ext4 /dev/sdb
### Create directory received mount
sudo mkdir /{disk_path}
### Mount
sudo mount /dev/sdb /{disk_path}
### Check mount
df -h
### Unmount
sudo umount /{disk_path}
### Mount(Auto) - 추가 및 포멧 후 자동 마운트
sudo blkid
### 특정 위치로 Auto mount 하기
링크 참조
|
포트 확인, 열기 및 방화벽 확인
포트 확인
1
2
3
4
5
6
7
8
9
10
11
12
13
14
15
16
| ### 열려있는 모든 포트 표시
netstat -nap
---------------------------------
-n: host명으로 표시 안함
-a: 모든소켓 표시
-p: 프로세스ID와 프로그램명 표시
---------------------------------
### LISTEN 중인 포트 표시
netstat -nap | grep LISTEN
### 확인하려는 포트번호 상태 확인
netstat -nap | grep 포트번호
### 특정 포트 상태 확인
nc -z www.google.com 80
|
방화벽은 iptables로 설정하는 방법과 ufw로 설정하는 방법이 있음
방화벽 설정(iptables)
1
2
3
4
5
6
7
8
9
10
11
12
13
14
15
16
17
18
19
20
21
22
23
24
25
| ### 방화벽 설정 정보 확인
iptables -nL
### 외부에서 접속하도록 열기
iptables -I INPUT 1 -p tcp --dport 12345 -j ACCEPT
### 내부에서 외부로 나갈 수 있도록 포트 열기
iptables -I OUTPUT 1 -p udp --dport 9002 -j ACCEPT
### 추가한 설정 조회
iptables -L -v
### 추가한 설정 삭제
### a) 추가한 규칙의 번호로 삭제하는 방법
iptables -D INPUT 1
### b) 추가했을 때의 명령어에서 "-I"를 "-D"로 바꾸어 주는 방법
iptables -D INPUT -p tcp --dport 12345 -j ACCEPT
### 변경사항 저장
service iptables save
### 변경사항 재시작
/etc/init.d/iptables restart
|
방화벽 설정(ufw)
1
2
3
4
5
6
7
8
9
10
11
12
13
14
15
16
17
18
19
20
21
| ### default set으로 초기화
ufw default deny incoming
ufw default allow outgoing
### 포트 허용
ufw allow 80
ufw allow 6000:6007/udp
ufw allow from 203.203.203.203 to any port 22
### 포트 불허
ufw deny 22
### 룰 삭제
ufw delete allow 80
ufw delete 3 ### 번호로 지우는 방식
### 상태 확인
ufw status
### 방화벽 시작
ufw enable
|
tar 압축
1
2
3
4
5
6
7
8
9
10
11
| ### tar(tar.gz)로 압축하기
tar -(z)cvf [파일명.tar(.gz)] [폴더명]
### ex) abc라는 폴더를 aaa.tar로 압축하고자 한다면
tar -(z)cvf aaa.tar(.gz) abc
### tar(tar.gz)로 압축풀기
tar -(z)xvf [파일명.tar(.gz)]
### ex) aaa.tar라는 tar파일 압축을 풀고자 한다면
tar -(z)xvf aaa.tar(.gz)
|
ACL permission이란?
- linux에서 permission의 기존 3비트 * 3비트 * 3비트(ex : 775) 권한에 추가한 확장 권한
- getfacl {directory} 로 full permission을 확인 가능
- https://dgblog.tistory.com/156
ACL permission 지우기(권한 맨 뒤에 +)
1
| setfacl -bn {directory}
|
파일 생성하기
1
2
3
4
5
6
| ### touch
touch {file_name}
### cat
### cat은 파일을 생성하면서 데이터를 입력할 때 사용한다
cat > {file_name}
|
디렉토리 생성하기
File descriptor
설명
- A file descriptor is a number that uniquely identifies an open file in a computer’s operating system
- When a program asks to open a file — or another data resource, like a network socket — the kernel:
- Grants access
- Creates an entry in the global file table
- Provides the software with the location of that entry
Linux에서의 default file descriptor(3개)
| Name | File descriptor | Description | Abbreviation |
|---|
| Standard input | 0 | The default data stream for input, for example in a command pipeline. In the terminal, this defaults to keyboard input from the user. | stdin |
| Standard output | 1 | The default data stream for output, for example when a command prints text. In the terminal, this defaults to the user’s screen. | stdout |
| Standard error | 2 | The default data stream for output that relates to an error occurring. In the terminal, this defaults to the user’s screen. | stderr |
descriptor 관련해서 grep 등 내용은 추가 예정
프로세스 상태 확인(메모리, CPU 사용량 등)
1
2
3
4
5
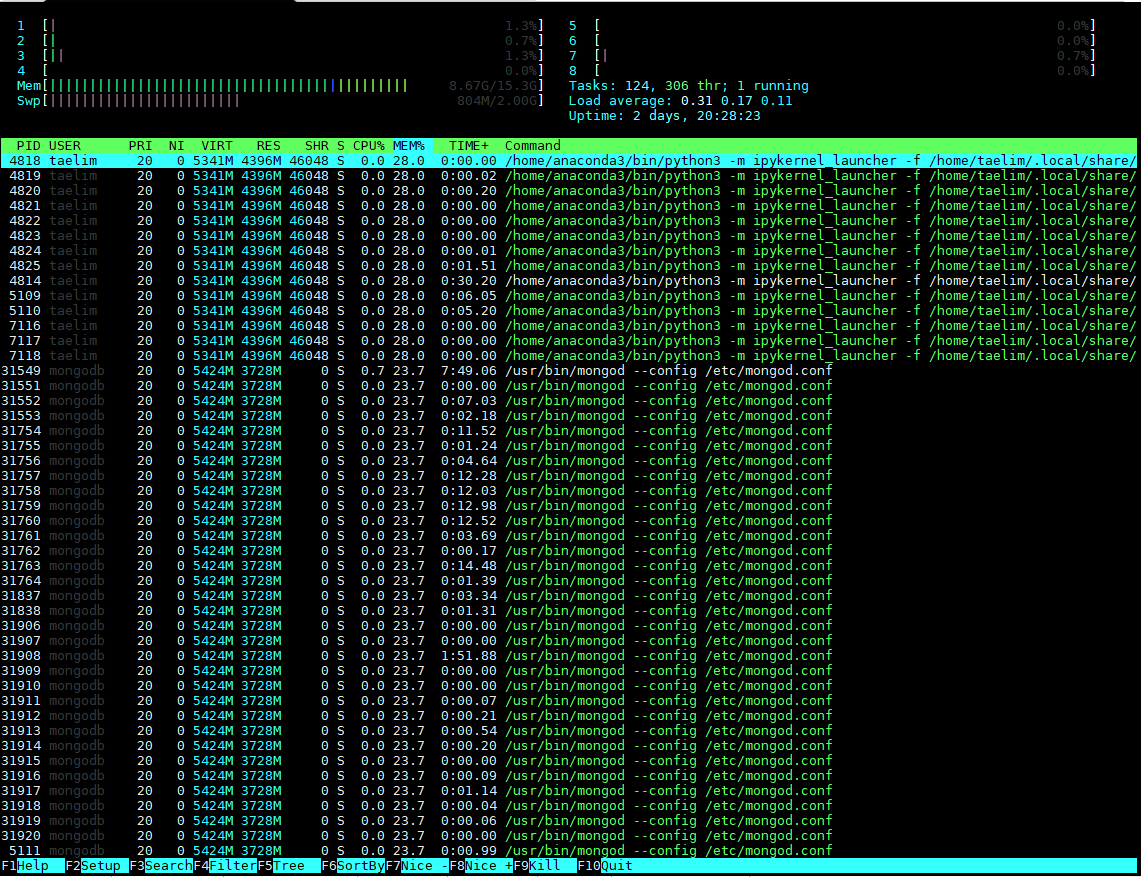
| ### 설치
sudo apt-get install htop
### 실행
htop
|
실행화면은 다음과 같으며, 주요 특징은 클릭을 통한 항목 정렬, 선택이 가능한 점이다
참조 링크
Service 등록
Access Control List
방화벽 설정(iptables)
방화벽 설정(ufw)
File descriptor
Auto mount 하기